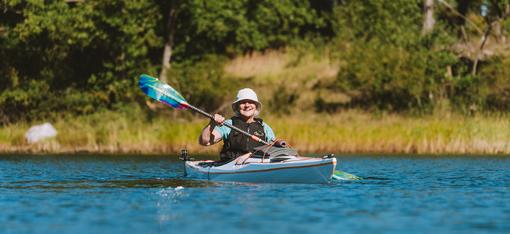
Reading Rivers with W.O.R.M.S.

The conservative line? The gnarliest line? Looking at a section of whitewater can be overwhelming at first, but breaking down what you see into W.O.R.M.S. can help simplify scouting. From class one to class five, this tried and true mnemonic provides a straightforward method of thinking and talking through reading a river to safely pick your line.

Water
Where is the water flowing? Where is it pushing back or changing directions?
Start with the simplest observation: where the water is going. Look for where it’s flowing down in main channels, pushing back against rocks or dropping down, and circulating back up in pools (called eddies). The main current will usually present with a smooth V or tongue shape.
The direction of flow and colour also gives us information. The deepest, main channel will usually be the darkest in colour. When water runs against a rock and pushes back in a white wave, it’s called a pillow. Where it drops down smoothly over a ledge and meets with foam at the bottom is called a seam. Where it boils up below the seam shows the size of the hole and where it boils below an eddie shows the eddie line. Observe all these colours and changes in direction to understand where the water would then take you in your boat.

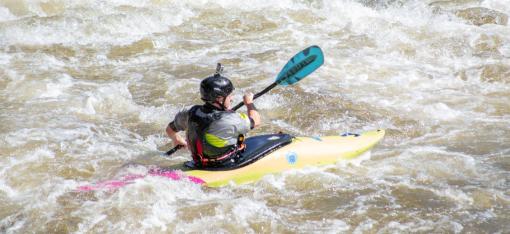
Obstacles
What is causing the water to go in those directions? What are obvious obstacles I can see right away? If I look closer, what can I see below the surface? What hazards do they each present?
Look for large rocks creating pillows, drops circulating holes below, trees acting as strainers, and rock piles or undercut cliffs creating sieves. Don’t forget to keep an eye out for human-built obstacles like walls, low-head dams, or fences, as well as other paddlers on the river.
After noting what obstacles are present, think through the level of hazard or risk they present. There’s a big difference between a massive drop that is an absolute no-go-zone or just some smooth shallow rocks with low consequence. Talk about how each obstacle is a hazard and what would happen if you got caught there. This will help you decide if a section is safe to run or not, based on the worst case scenario and how likely it is to happen.

Route
What route am I going to choose? How much risk or play do I want? If I miss my first choice, what’s my back up plan and how will I get there?
If you’ve now decided there are safe lines to run based on the water flow and obstacles, you can decide which route you want to take, considering the challenge and fun levels, as well as safety. Start from the top of the section and run through the potential line in your mind, branching out with possible ways you could get pushed or end up. Pick a plan A, B, and C, if possible.Think: “Okay, if I can’t make it into that eddy, then I’ll readjust to the left to grab that next one.”

Markers
How will I remember my route? What markers should I watch out for?
The river will look drastically different when you’re on the water, so it can be hard to remember your route once you’re down there. By choosing markers on the river, objects like major rocks, trees, eddies, or points of land, you can help keep yourself focused. Think: “Ah yes, once I’m through this wave, I need to angle left to aim for that rock and then tuck behind into the eddy.”

Safety
Are there bigger upstream or downstream hazards to consider? What are my backup plans? Who is my safety downstream? Where are points of safety where I can exit or rest, like eddies?
Now is a good time to check your map and think about additional upstream and downstream hazards. Downstream hazards could include features like another set of rapids, canyon walls, or a waterfall. These are important to consider in case the plan goes really south and a paddler or gear gets swept away. Upstream hazards may be less apparent, but can be just as important to think about. Consider other paddler groups who may be coming down (make sure to look upstream and signal before starting). Certain areas will have different hazards, such as high flood zones which can bring large debris downriver too. In an extreme situation of flash flooding, a group once had livestock floating downstream to watch out for.
Finally, while it’s good to visualize nailing the line you pick, it’s also important to consider what happens if you don’t. You’ve already picked your back up plans and how to get there, but now is the time to communicate with your partners and figure out if you need additional safety based on the probability of something happening and the level of consequence. It never hurts to have someone downstream, ready to rescue in their boat or with a throw bag on shore. Make sure to clearly talk through your plans and, if need be, review your river signals so you can communicate if plans change once you’re further away.
About the Author
Rachel Davies is an avid paddler, both professionally and personally. She has made home bases in the South Island of New Zealand and in the Canadian Rockies, where she has worked as a hiking, cycling, rafting and kayaking instructor. Packrafting came into her life to piece together her love of all these worlds while exploring new places through challenging, type-two fun adventures. Rachel aims to share this passion through her writing and artwork - follow along on IG @rachelmydavies and racheldaviesart.com.